Requirements for Hot Water Heater Installation
Hot water heater installation is a job that should only be done by professionals, as it involves working with a lot of complex equipment and requires knowledge of building codes and safety regulations. The requirements for hot water heater installation will vary slightly depending on where you live, but there are some basic safety guidelines that all installers should follow.
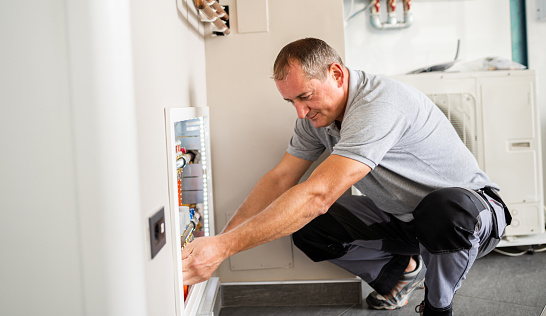
The installer must check the local building codes to make sure they are up to date and comply with all safety regulations. They should also verify that the necessary permits have been obtained before beginning work on the project. Additionally, they must be sure to use shut-off valves when connecting gas lines to ensure no gas leaks occur during installation or use. Finally, any electrical wiring involved in the process must meet local electrical code requirements and be installed correctly so as not to create a potential fire hazard.
Next, installers must choose an appropriate location to install hot water system based on its size and type. It is important for them to measure carefully before cutting into walls or other surfaces in order to ensure proper fitment and safe operation of the unit going forward. In addition, they need to check for adequate ventilation around their new hot water heater in order for it operate efficiently without producing dangerous fumes or excessive heat build-up in confined spaces.
Tools Needed for Installation
When it comes to installing a new system, there are certain tools that are necessary to get the job done right. Whether you’re a professional installer or a DIY-er, having the right tools on hand can make the process smoother and help ensure that your installation is successful.
The first tool you’ll need is an installation manual. This will provide step-by-step instructions on how to install your system correctly and safely. It will also provide troubleshooting tips in case of any issues that may arise during the installation process.
A good quality drill and drill bits are essential for drilling holes for mounting hardware, making connections between components, or wiring up electrical systems such as lighting or security systems. A variety of screwdrivers will also be needed to tighten screws into place and adjust settings where needed. Pliers can come in handy for removing old parts or for bending wires into place as required by certain systems.
Depending on what type of system you’re installing, some specialty tools may be necessary such as crimping pliers if you need to make any custom wiring connections, wire strippers if needing exposed wires etcetera Additionally, many newer installations require specialized bonding agents or adhesives so make sure these items are available.
Safety Considerations
Safety is an important factor to consider in any situation. Whether it’s in the home, workplace, or public place, safety should always be at the forefront of our minds.
At home, there are several considerations when it comes to safety. Fire and carbon monoxide detectors should be installed and regularly tested to ensure they are working correctly; smoke alarms should also be placed on each level of a home for best protection. Electrical outlets near water sources need to have ground fault circuit interrupters (GFCI) installed; this will help prevent electric shock if anything were to come into contact with the water source. Additionally, all appliances should be unplugged when not in use and extension cords should not be used as permanent wiring solutions as they can create a fire hazard if overloaded or damaged.
In the workplace, employers must take several measures to ensure their employees are safe from harm while on the job. First and foremost, all employers must provide their employees with proper training on how to safely operate any equipment or machinery that may be used during work hours; this includes providing adequate protective gear such as helmets, goggles, earplugs etc., when necessary.
Shutting off the Power or Gas Supply to the Heater
As winter approaches, you may be considering shutting off the power or gas supply to your heater. While it’s a great way to save money, there are important safety considerations that must be taken into account before doing so.
Shutting off the power or gas supply to your heater is not as straightforward as it may seem. While this can help you reduce energy costs, it can also pose a significant risk of fire and carbon monoxide poisoning if done incorrectly. That’s why it’s important to understand how to do this safely and properly before attempting any shut off procedures.
When shutting off the power or gas supply to your heater, start by knowing what type of system you have in place in your home. Depending on whether you have electric heaters, gas-powered furnaces, or a combination of both will determine which supplies need cutting off and how they need to be cut off safely. For example, if you have an electric heating system then simply turning off the circuit breaker for that system should suffice; however for a natural gas furnace there are more complex steps involved such as turning down the thermostat and disconnecting all igniters/gas lines leading up to the unit before finally shutting down natural gas at its source.
Disconnecting Existing Hot Water Heater
Hot water heaters are essential household appliances that provide hot water to your home. Without a hot water heater, it can be difficult to handle everyday tasks like doing dishes or taking a shower. While installing a new hot water heater is relatively easy, disconnecting an existing one requires more care and attention.
To begin, you need to shut off the power supply to your existing hot water heater. If you have an electric unit, make sure that the circuit breaker is in the “off” position. For gas-powered units, turn off the gas line at its source and make sure that all pilot lights are extinguished before proceeding any further.
Once you’ve turned off the power supply and gas line (if applicable), proceed with draining your existing hot water heater. To do this safely and properly, attach a garden hose to the drain valve located at the bottom of your unit and run it outside or into a nearby sink/tub if possible. Once connected securely, open up both cold-water valves located on top of your unit as these will allow any remaining stored up pressure within the tank itself to be released during the draining process once it starts flowing through hose pipe attached earlier on the bottom side of the tank itself .
Installing New Hot Water Heater
Installing a new hot water heater can seem intimidating, especially if you are unfamiliar with home improvement projects. But with the right tools and supplies, and a little bit of knowledge, it is possible to do it yourself. Here’s what you need to know about installing a new hot water heater in your home.
Step 1: Purchase the Right Hot Water Heater
When choosing a new hot water heater for your home, there are several factors to consider. First, decide on the type of fuel that will power the unit (typically either gas or electricity). You should also consider the size of your household and its needs when selecting an appropriate tank size for maximum efficiency. Lastly, make sure that any model you select is rated for use in your geographic area—some models may not be suitable for certain climates or altitudes.
Step 2: Follow Safety Precautions
Before beginning any installation project involving electrical wiring or natural gas lines, it is essential to take all necessary safety precautions to prevent injury or property damage from occurring. Make sure electric power sources have been shut off before doing any work on gas lines; likewise turn off gas valves before beginning work with electrical wires or components. Properly ventilate areas where natural gas will be used
Connecting Pipework to New Hot Water Heater
Connecting pipework to a new hot water heater can seem intimidating, but it is an important part of the process when installing a new system. It is important to understand the basics of how to connect the pipes and ensure that everything is secure and leak-free. This article will cover some tips on connecting pipework to your new hot water heater.
You will need to determine which type of connection you are going to use for your hot water heater. There are two common options: copper pipe or flexible hose connections. Copper pipe connections require soldering and should be done by an experienced plumber or electrician, while flexible hose connections can be installed by anyone with basic plumbing knowledge. Both have their advantages so make sure you choose the option that best suits your needs and budget.
Once you’ve chosen your connection type, it’s time to assemble all the necessary parts for installation. Make sure all fittings are tight before connecting them together; any loose pieces can create leaks which can cause damage both short-term and long-term over time. Additionally, make sure all pipes are cut correctly; too long or too short pipes won’t fit into place properly causing further complications down the road as well as potential safety hazards if
Testing and Adjustments After Installation
Testing and adjustments after installation are necessary to ensure that an electrical system is functioning correctly and safely. Every electronic device or system must go through a series of tests to make sure it meets the required standards and specifications.
The first step in testing and adjustments is to inspect the new equipment or system for any visible defects, such as loose wires, missing components, or other physical damage. Any problems should be corrected before further testing begins. After the equipment has been inspected, the next step is to perform tests on each component of the system in order to verify that it meets all safety requirements. This may involve checking voltage levels, current draw, insulation resistance, ground continuity, etc., depending on what type of device or system is being tested.
Once all components have passed their individual tests and have been verified as safe for use, then it’s time for adjustment procedures such as tuning parameters to optimize performance. This includes setting up specific voltage levels at different points throughout the circuit (if applicable), calibrating sensors and other devices according to manufacturer’s instructions (when available), adjusting potentiometers/variable resistors within acceptable ranges; setting appropriate switching delays; etc., depending on the type of device or system being adjusted.
Troubleshooting Common Problems
When a problem arises, troubleshooting can be one of the most frustrating experiences. In today’s world of complex digital systems, there are many common problems that can arise and knowing how to troubleshoot them is essential for keeping your system running smoothly. Here are some tips to help you identify and fix common problems.
1. Start with the Basics: One of the first steps in troubleshooting any problem is to ensure the basics are covered. Check cables, power cords, batteries, etc., and make sure they’re all properly connected and working properly. Make sure all software is up-to-date and that any hardware drivers are installed correctly.
2. Check Your System: Once you’ve checked the basics, it’s time to take a deeper dive into your system. Use diagnostic tools like Windows Task Manager or System Information to check memory usage, processor speed, network connections etc., as well as checking on any error messages or warnings being reported by your system or applications running on it..
3 .Check Connectivity Issues: If you’re having trouble connecting to a network or website then double check that all settings such as ports settings.